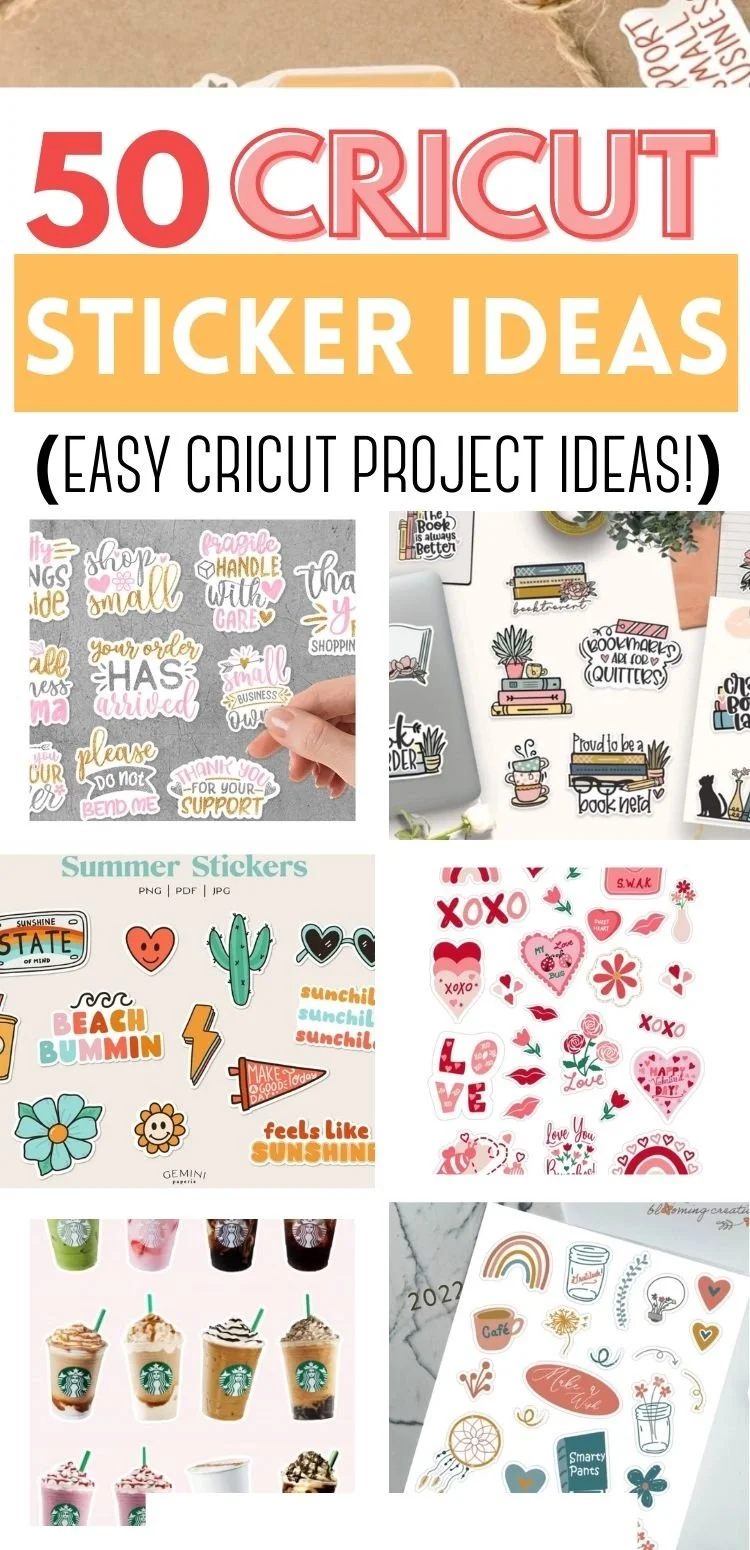
HOW TO MAKE CRICUT STICKERS WITH A CRICUT MAKER.
Upload a sticker file. You can get access to this free file within my resource library. Details are below.
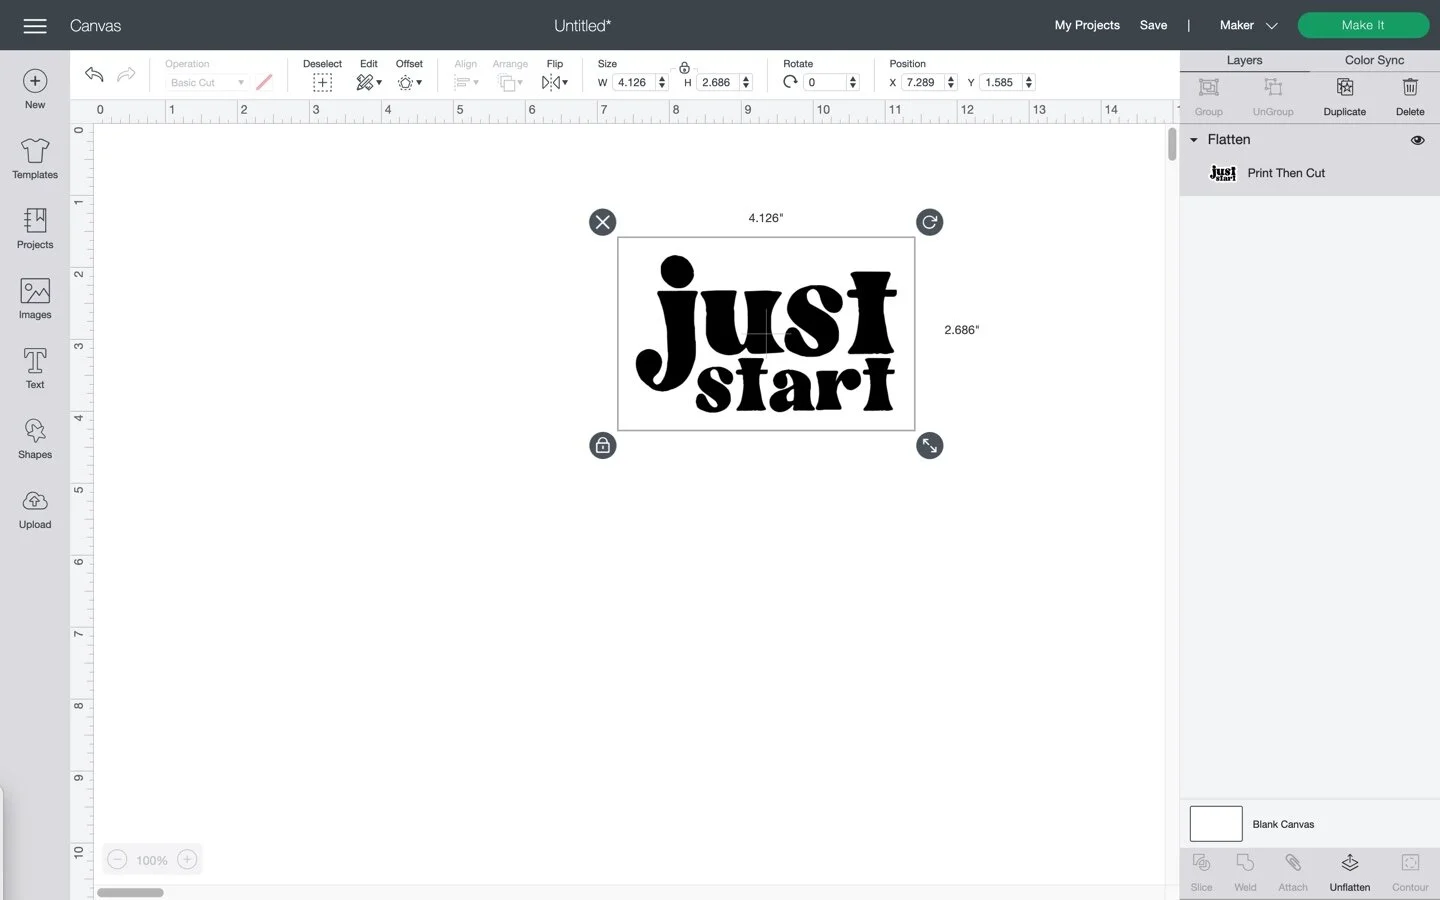
Print image with Print then cut.
Select the appropriate material before you cut within Cricut Design Space.
Load blue mat and fine point blade into your machine.
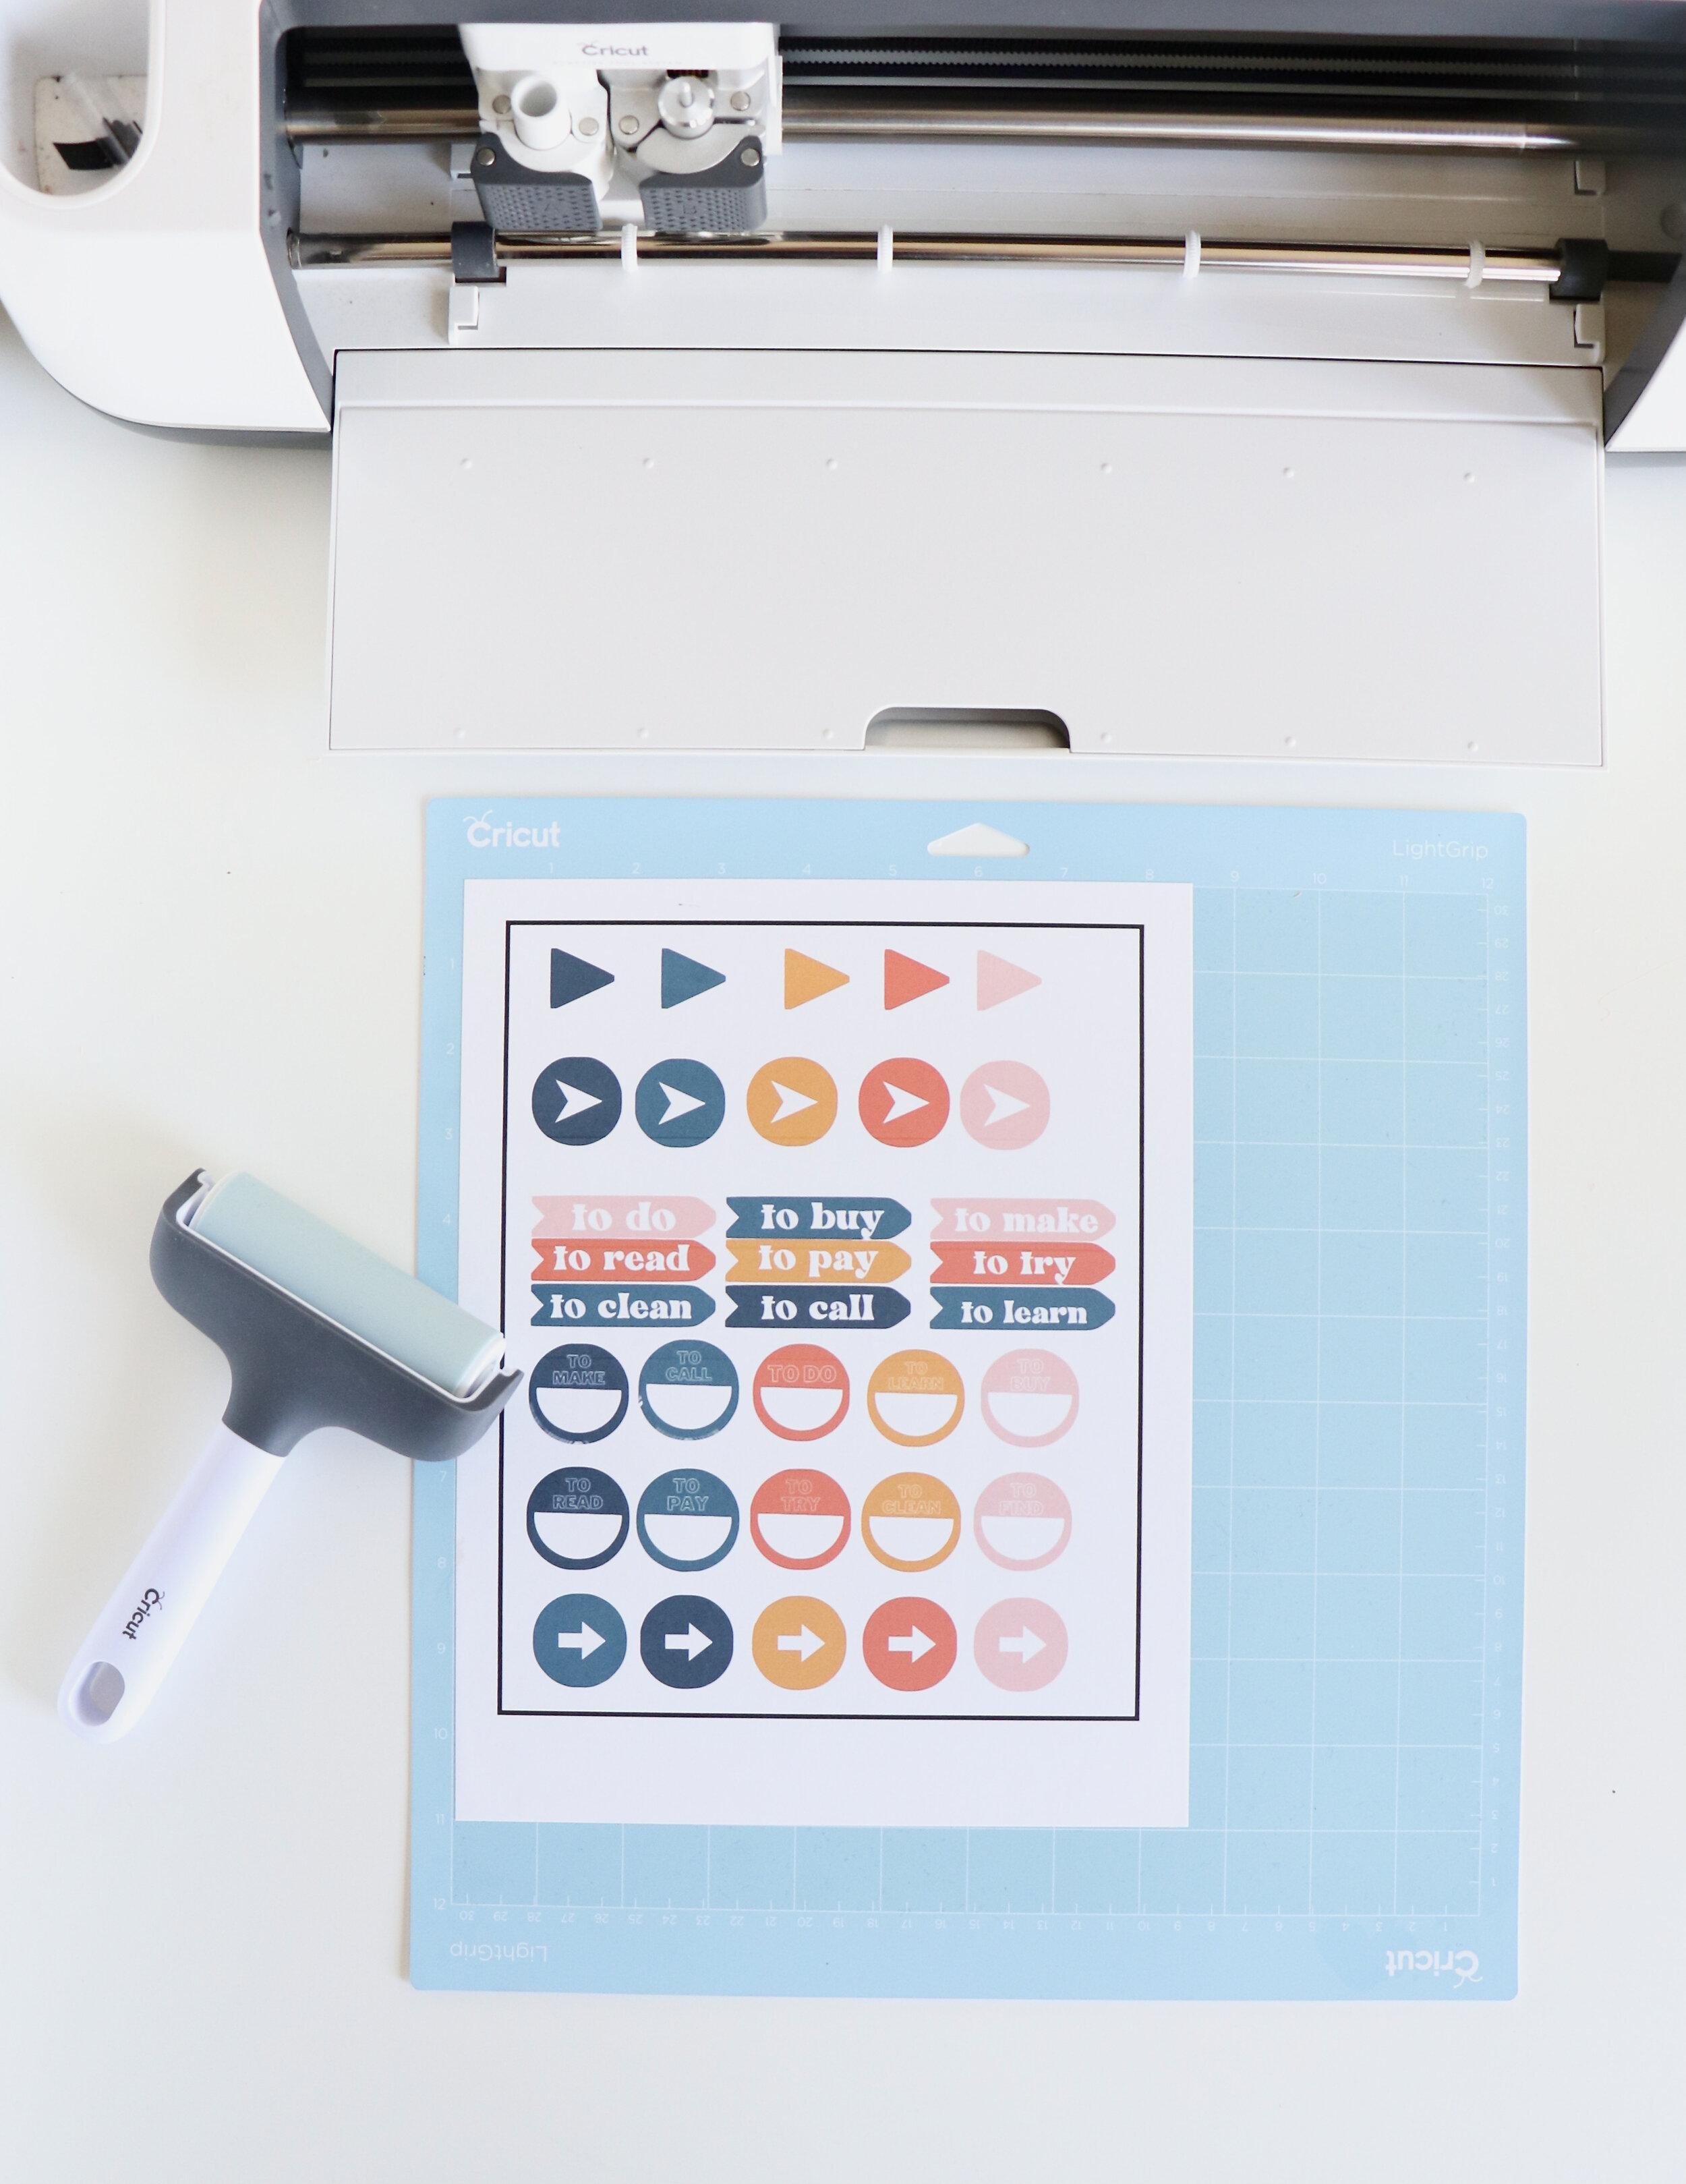
Cut stickers.
Remove stickers from the mat. If the stickers curl, try removing the mat first. Turn your mat over and remove the mat from the paper.
Let’s walk through each of these steps in more detail!
This post contains affiliate links. If you purchase something from this website, I may receive a commission at no extra cost to you.
WHAT DO YOU NEED TO MAKE STICKERS WITH A CRICUT MAKER?
Cricut Maker. You can also use a Cricut Explore Air 2
Inkjet Printer. I use an HP pro 8710.
Free Sticker Cut File. You can get access to this free file at the bottom of this post or inside my free resource library.
HOW DO I MAKE STICKERS FOR BEGINNERS?
I am going to walk you through 3 ways to make stickers with a Cricut Maker.
Upload my free file from my resource library.
Create your own stickers inside Cricut Design Space.
Create your own stickers with design software like Canva and upload that design into Cricut Design Space.
How to make stickers for beginners by using a free sticker cut file.
Step 1. Upload the free sticker file into Cricut Design Space.
You can download my free sticker cut file for free in my resource library. See details at the bottom of this post.
Once you have downloaded the file, you can upload the PNG file into Cricut Design Space.

Open a new project in Cricut Design Space.

Click UPLOAD. Choose the PNG file you downloaded to your computer.

On the right side, Cricut Design Space will ask you to select an image type. I choose complex.
Click continue.
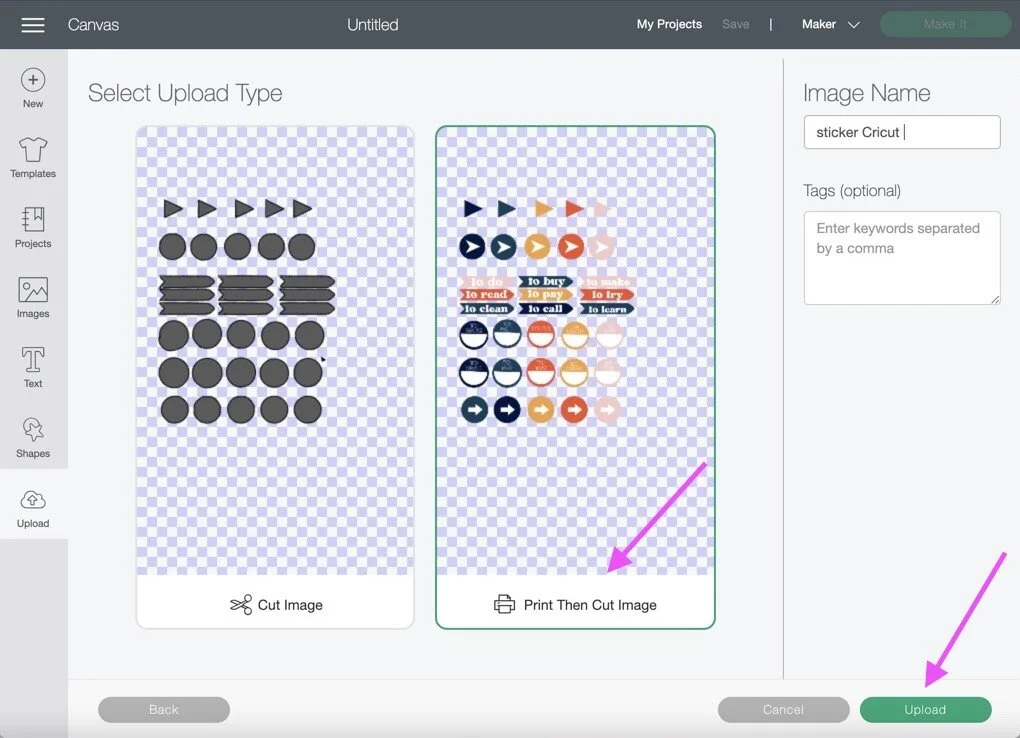
Next, click Print Then Cut Image. You can save your project if you want.
Click upload.

You will notice those blue and white squares behind the sticker image. This means your image is transparent. My cut file is transparent so you don’t need to do anything else.
Click continue.

Click on the file you just uploaded. Click on Insert Image.
Related:
How to upload an image into Cricut Design Space
Cricut Design Space for Beginners
10 Things You Need to Know about a Cricut Maker
Step 2. Print the sticker image with Print then Cut.
Before we get to all the steps, it is important to understand some basics about sticker making with a Cricut Maker.
What is Print then Cut?
Print then cut is a feature with Cricut Design Space that allows you to send images to your home computer to print. Then, you load this printed image on a cutting mat and a Cricut Maker will cut these images for you.
Forget your scissors! The Cricut Maker or Cricut Explore Air 2 will do it for you.
You need to have an inkjet printer for this feature to work.
The maximum size of your print then cut image is 6.75” W x 9.25” H. We will talk more about this later in the post, but is super important to note this for later!
I will walk you through the entire print then cut process later in this post.
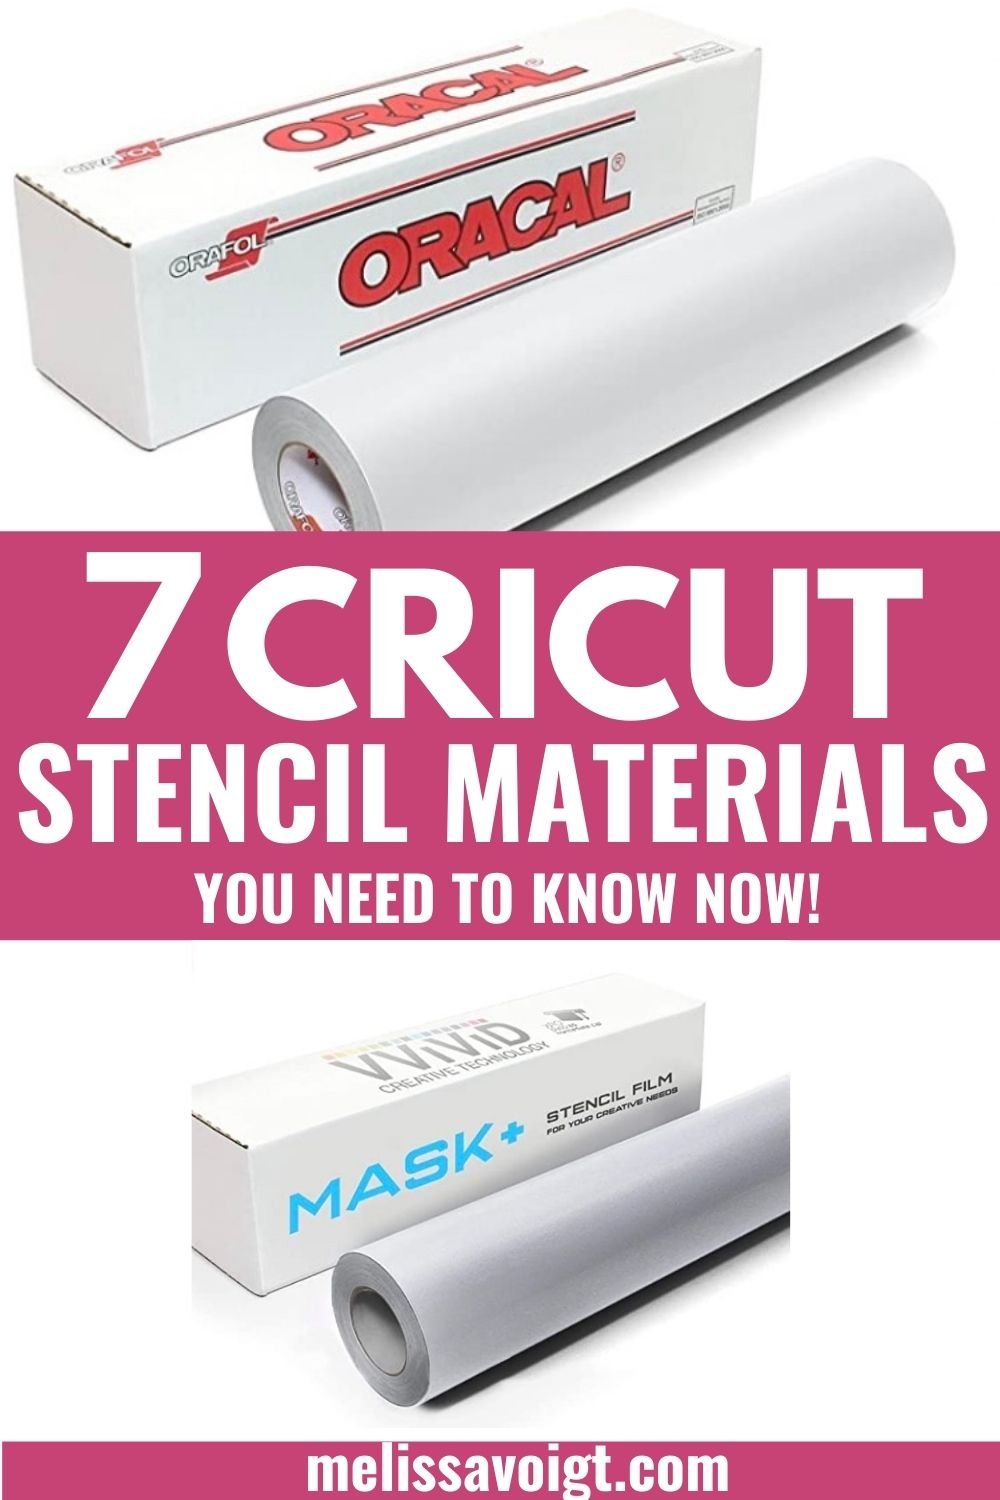
Best Sticker Paper for Print then Cut?
Most sticker paper comes in 2 different types: vinyl or paper. Typically sticker paper comes in 8 1/2 x 11-inch sheets. You can use both vinyl and paper with a Cricut Maker to make stickers.
Printable vinyl is not the same as sticker paper. Printable vinyl is used for decals. Sticker paper is used to make traditional stickers (think planner stickers). The advantage of printable vinyl is that printable vinyl CAN get wet. Traditional stickers are made of paper and are not waterproof.
For Sticker Paper we recommend:

For vinyl stickers we recommend:


Let’s make stickers!
If the image loads small, you can enlarge the png file before you print.
Load sticker paper in your inkjet printer. We do one sheet at a time to avoid a paper jam.
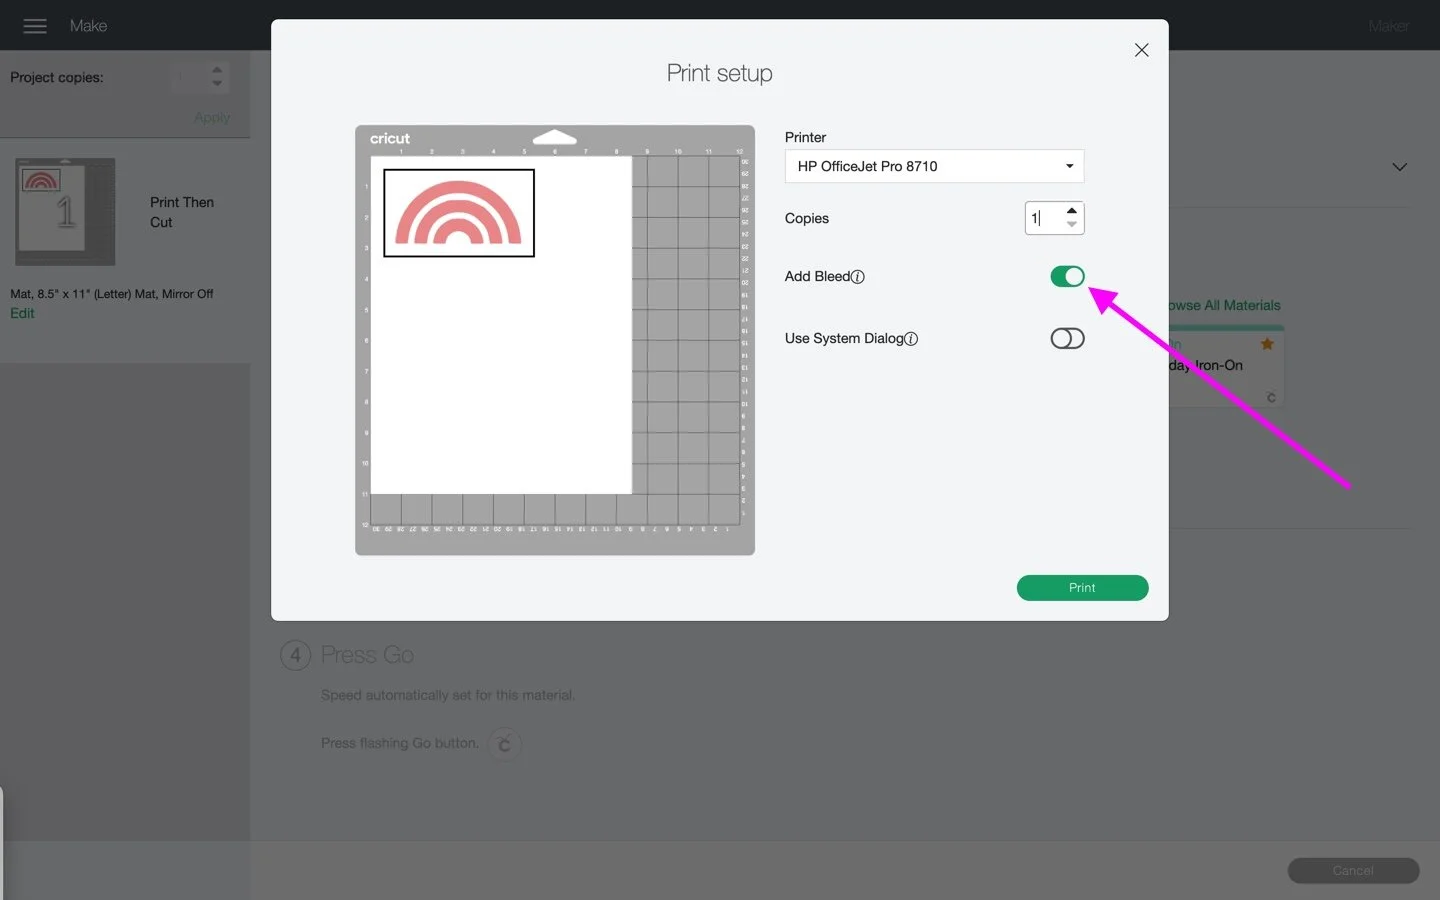
Click Make It.
Note: Be sure to read through the directions on the paper you purchased. Some paper will need some drying time before you cut to reduce smudges.

Notice on the left side of the screen, Cricut Design Space has designated this project as a Print Then Cut. Make sure your project has the same description.
Click Continue.

Click Send to Printer.
STEP 3. Selecting the correct setting before you cut.

It is important to select the correct setting before you cut within Cricut Design Space. I like to use the “Sticky Note” setting. If you don’t want the Cricut Maker to cut all the way through (often called a kiss cut”), try the “WASHI” setting.
A Cricut Maker or Cricut Explore Air 2 will make a “kiss cut” sticker. This means it will cut through only the top layer of your sticker. The back layer of your sticker will not be cut.
OR you can cut your stickers in a die-cut. In this way, the stickers will be cut all the way through the top layer and the bottom layer.
I prefer the “Sticky Note” setting but if you are having trouble with your cuts, experiment with the Washi setting on your machine.
Note: If you are using a Cricut Explore Air 2, be sure to turn the dial to the custom setting.
Step 4. Prepare your machine.
Place your sticker paper on your blue mat.
Line up the sticker paper as close as you can in the upper left-hand corner of the mat
Use a roller to ensure the paper is sticking to the mat.
Load a fine point blade into your machine.
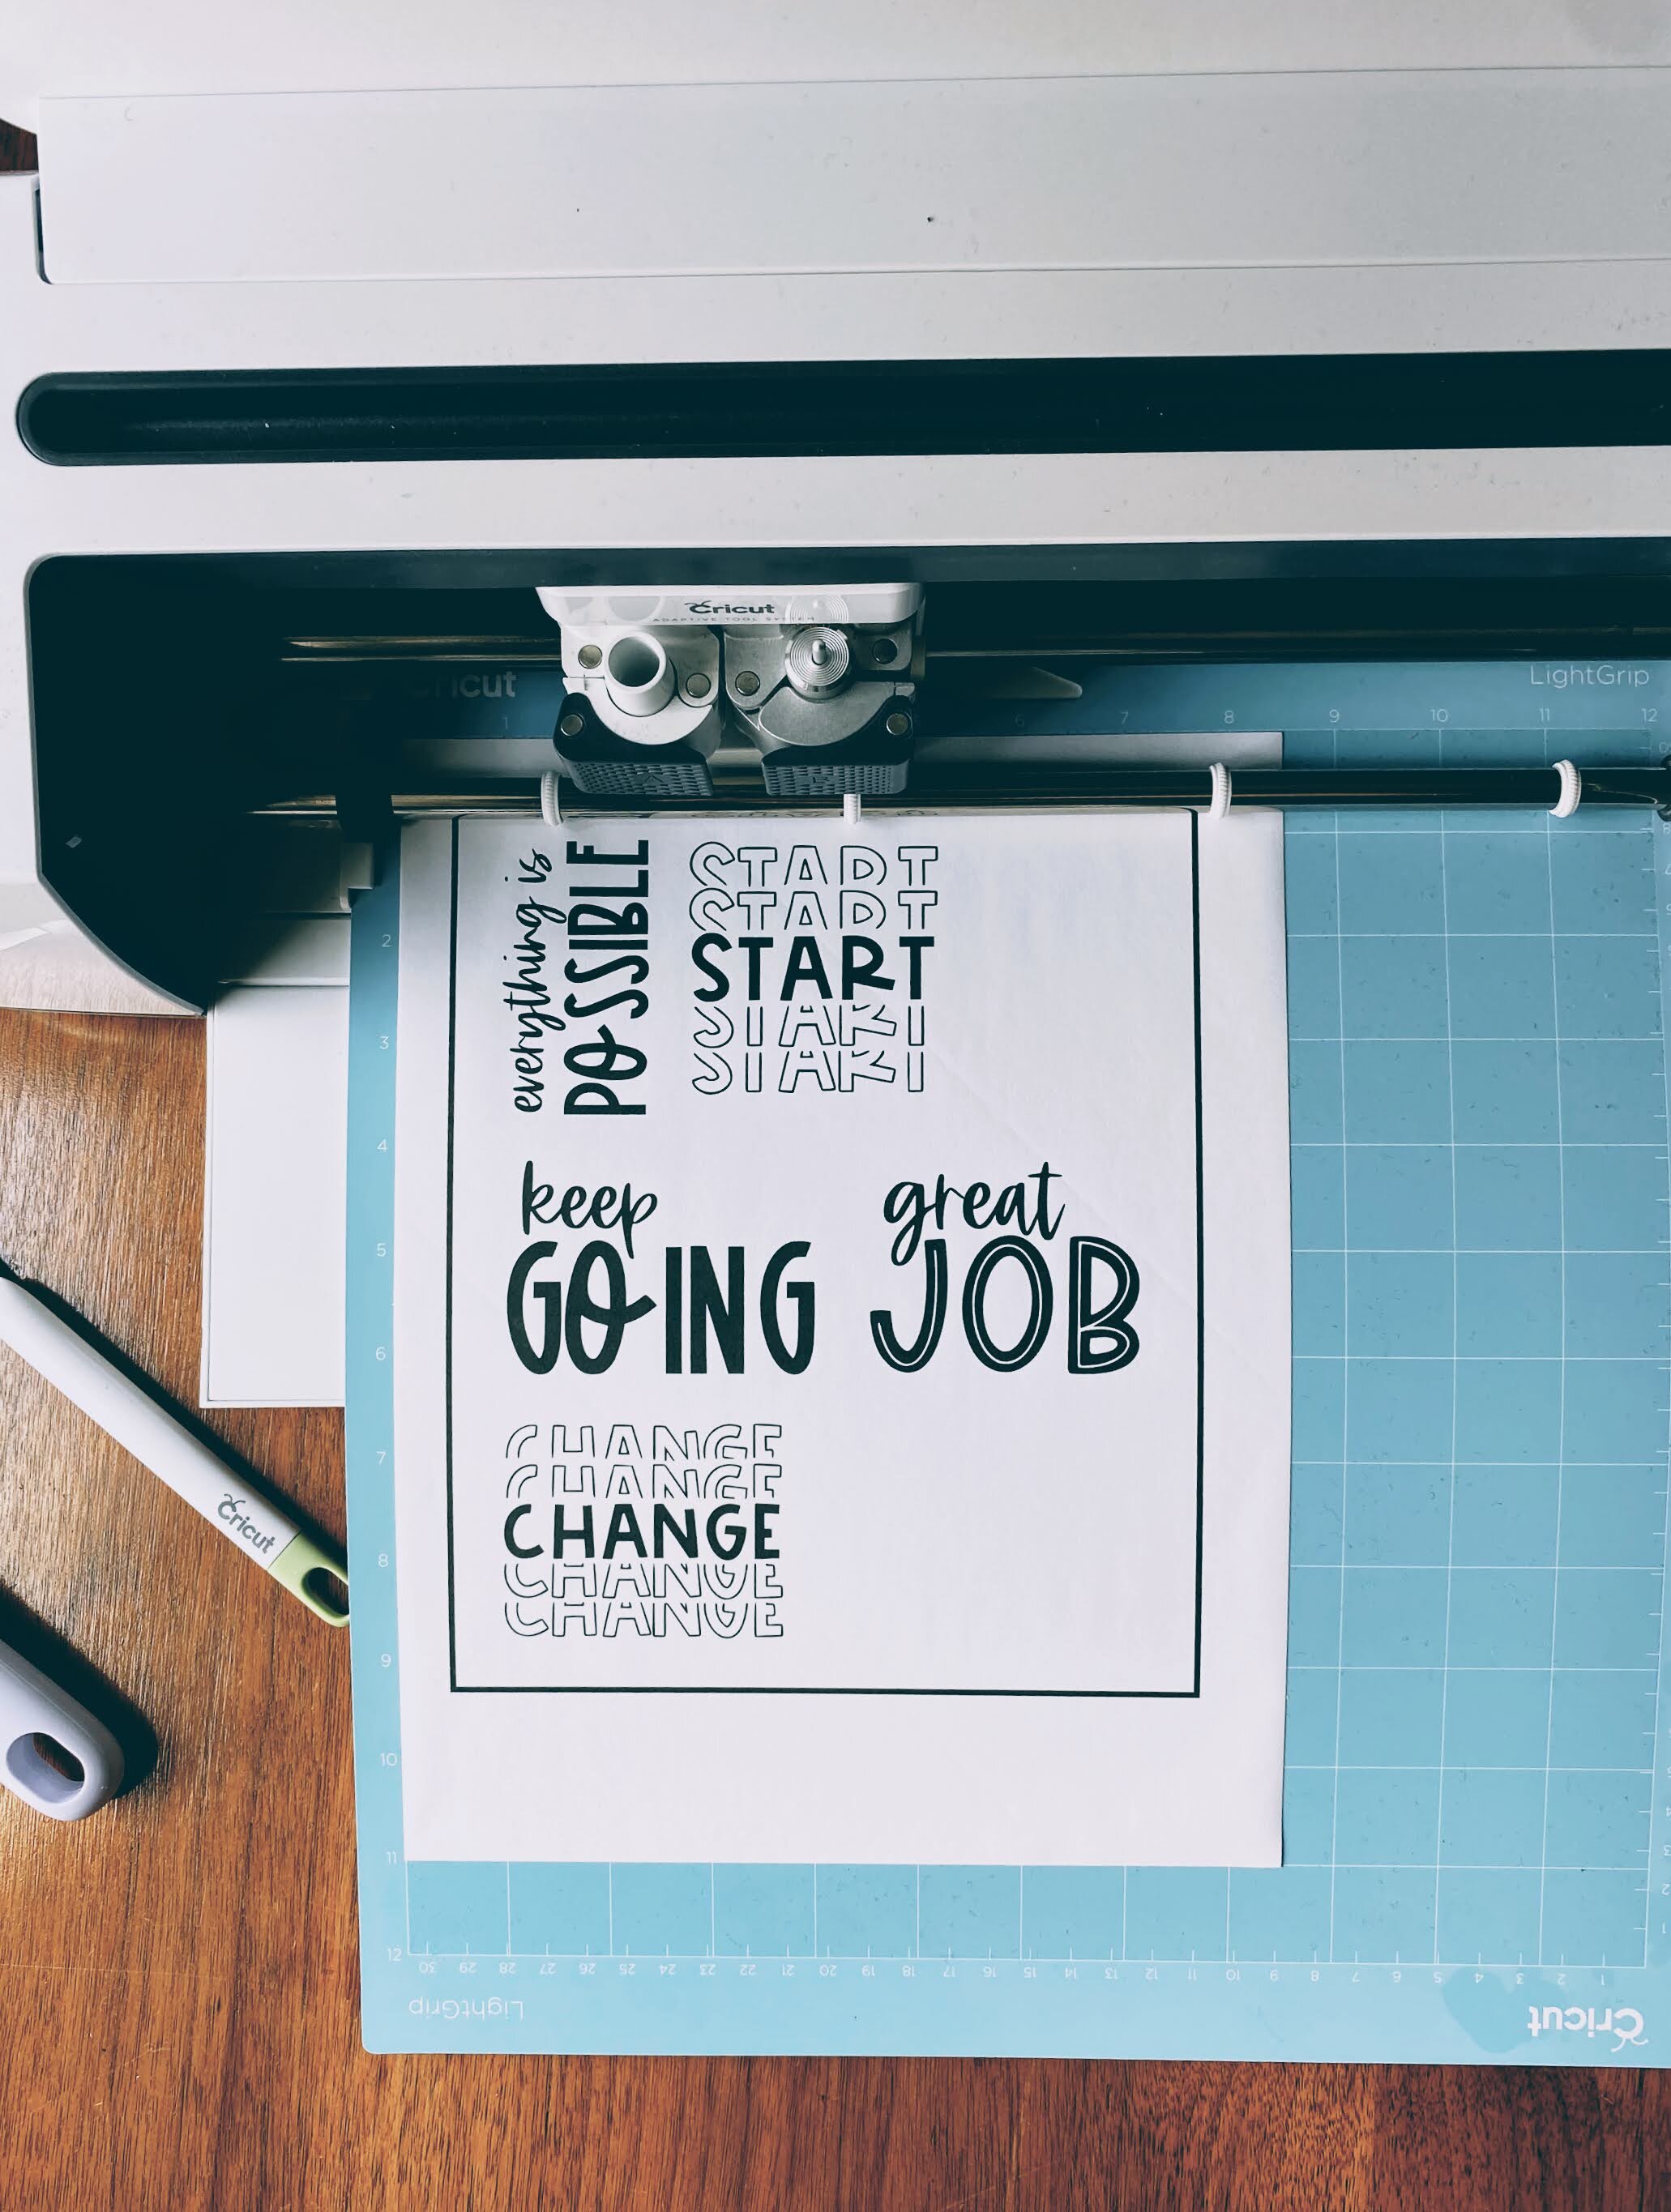
Step 5. Cut Stickers.
Load your mat into your machine
The C on your machine will blink when it is ready to cut. Press that C when is blinking to start cutting.
Your machine will scan your project first to “see” the black lines of your paper. Then, the machine will cut.
Step 6. Unload the mat and remove the stickers from your mat.
Press the flashing arrow when the machine is done cutting to unload the mat from your machine.
Check the cuts of your stickers. Is this what you wanted? I like to double-check all the cuts before I remove a project from my mat.
Remove the excess paper from your mat. The stickers you created will still be on the mat. Gently remove the sticker from the mat.
If you are having trouble with stickers curling, try to remove the stickers from your mat by turning the mat over. Remove the mat from the stickers rather than removing the stickers from the mat.
If you don’t turn the mat over and remove the stickers first, the stickers may roll. By turning the mat over and removing the mat first, the stickers should stay flat.
Cricut Sticker Making Tips and Tricks
What is the maximum size for stickers?
The maximum size of your print then cut image is 6.75” x 9.25”. Cricut will warn you if the image is too big in the right-hand panel of Cricut Design Space (see arrow below).

Notice the yellow triangle? This means the image is too large for Print then Cut. If this happens, simply resize the image.
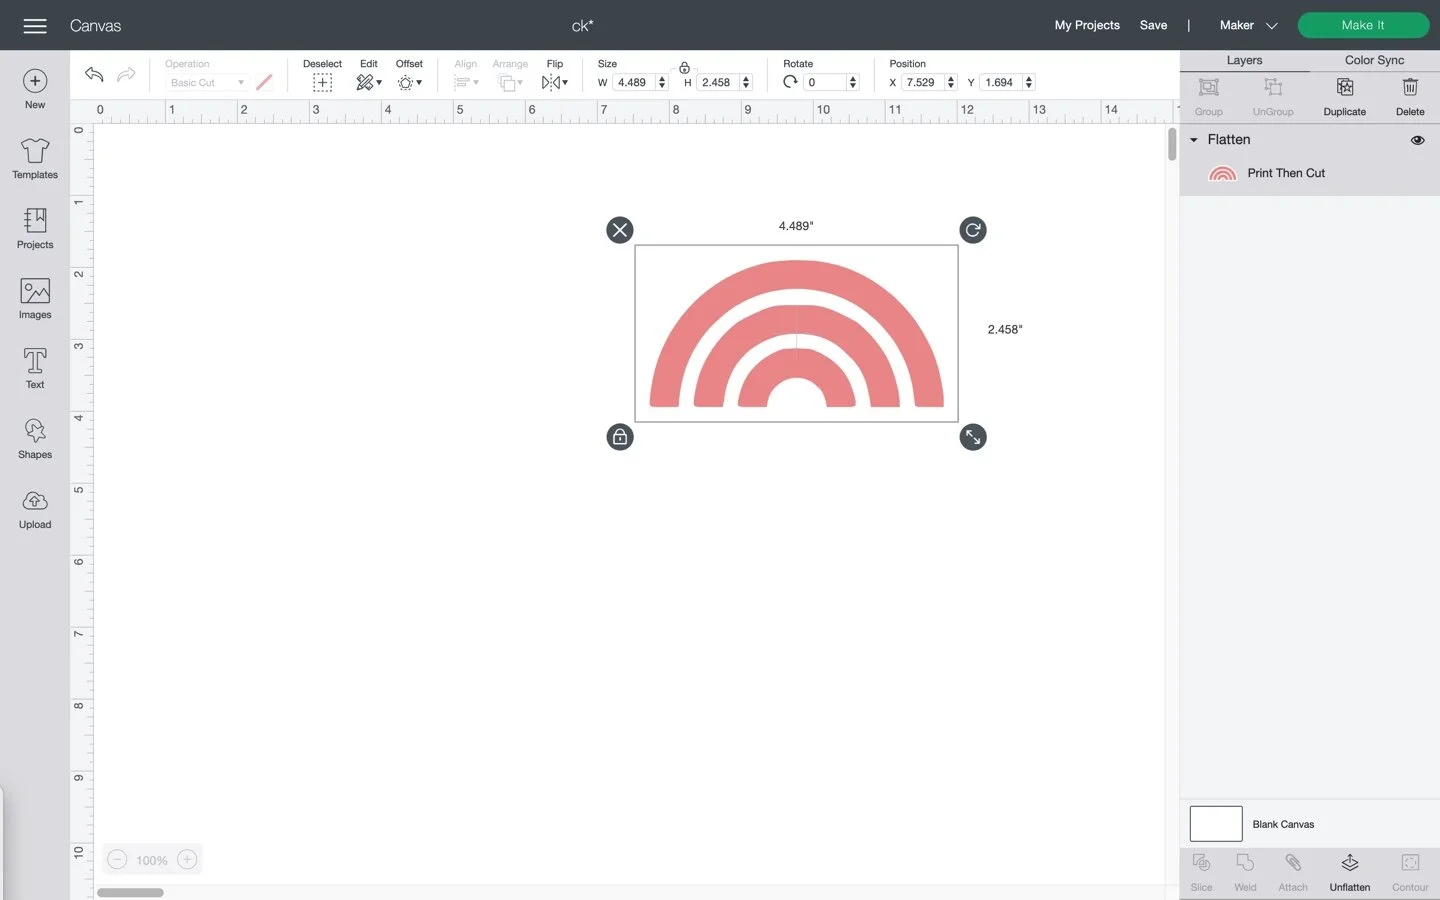
How do I get that extra white edge around my stickers?
In Cricut Design Space, you can create an extra white edge around a sticker. In my example below, if I don’t create a border around my rainbow, Cricut will cut each arch into a sticker. To remedy this, I created an offset.
Note: You will need to create an offset with stickers that have words too. More on that below.
I still use the bleed function in print setup when I create an offset.
Let’s walk through how to create an offset step by step.

Click on one of your Cricut Images. Click on Offset.
You will notice a border will appear around the image. Move the distance up or down to increase or decrease this border.
Click Apply.
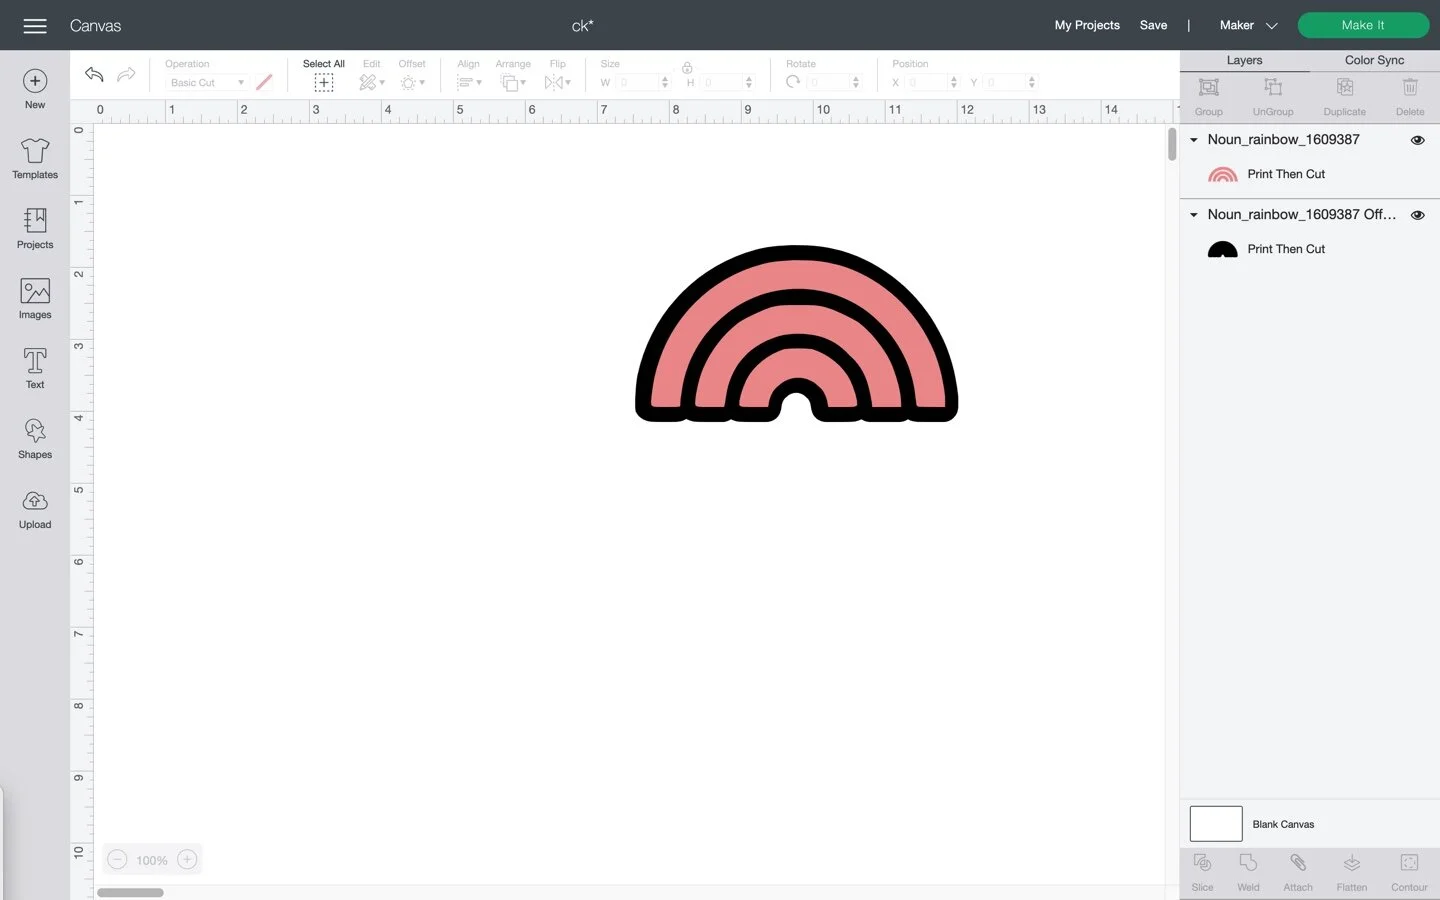
The offset we created turned black in my example. If you want to change the color, Select all.
Align images center horizontally and center vertically.
Select All. Click Attach.
Click on the black rainbow in the layers panel. Make the color white.
Select All. Click Flatten.
Pay attention to the layers panel. Do you see a white border around my image? This is what you want! The Cricut will cut around your image instead of inside each line!
How do I make stickers inside Cricut Design Space?
You can design your own stickers right inside Cricut Design Space.
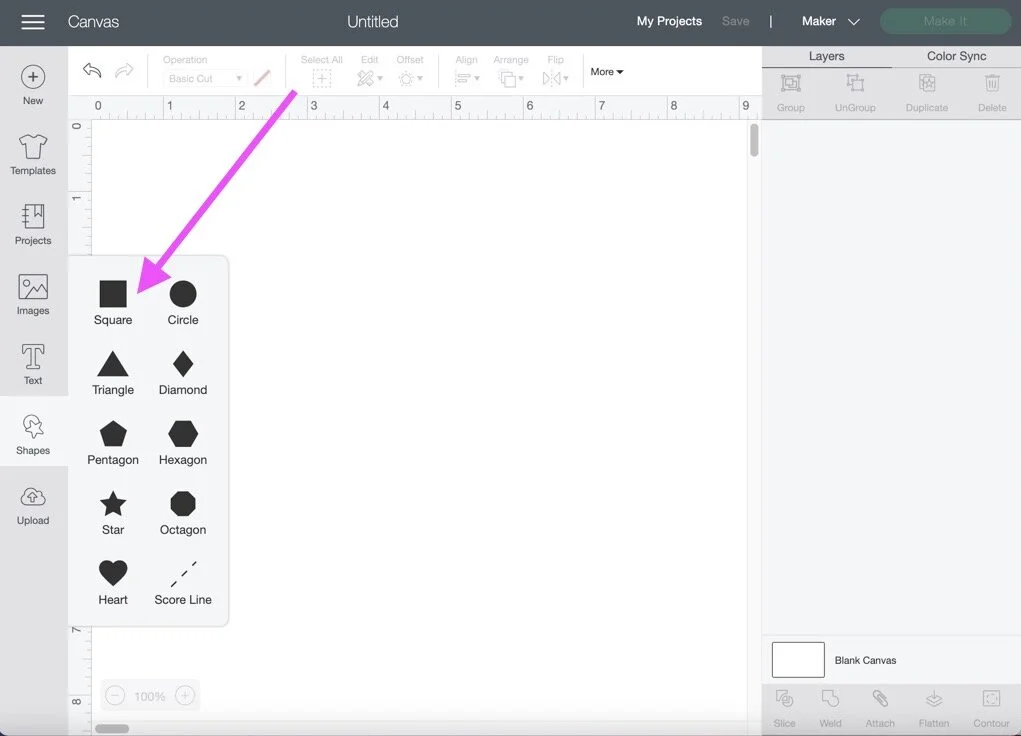
Open a New Project Window. Click on the Shapes menu and select a square.

Change the size of the square to a rectangle by clicking the unlock feature in the size portion of the toolbar. Type 6.75” in the width and 9.25” in the height.
Change the color of the rectangle to white.
Now you have a blank canvas guide to create stickers. The stickers you create cannot go outside the border of the rectangle.
You can move the guide back and forth over your creations to make sure you are within the guide. Be sure to delete this guide before you print.
Next, think about what stickers you’d like to create.
Do you want to create a sheet of round stickers for planner stickers or a bullet journal?
Do you want to create square stickers for reminders about paying bills, cleaning schedules, school tasks, etc?
Do you want to create quote stickers with fun fonts?
Do you want to create decals of images (think rainbows, coffee cups, state images, etc?
When designing, remember to keep your shapes and images inside the image size for print then cut. You can get images, fonts, and shapes right inside Cricut Design Space.
Most image-based stickers (think coffee cups, rainbows, etc) are typically between 3” and 3.5”.
For small planner stickers, you can size them to whatever your preference is. I prefer 1/2” to 3/4”.
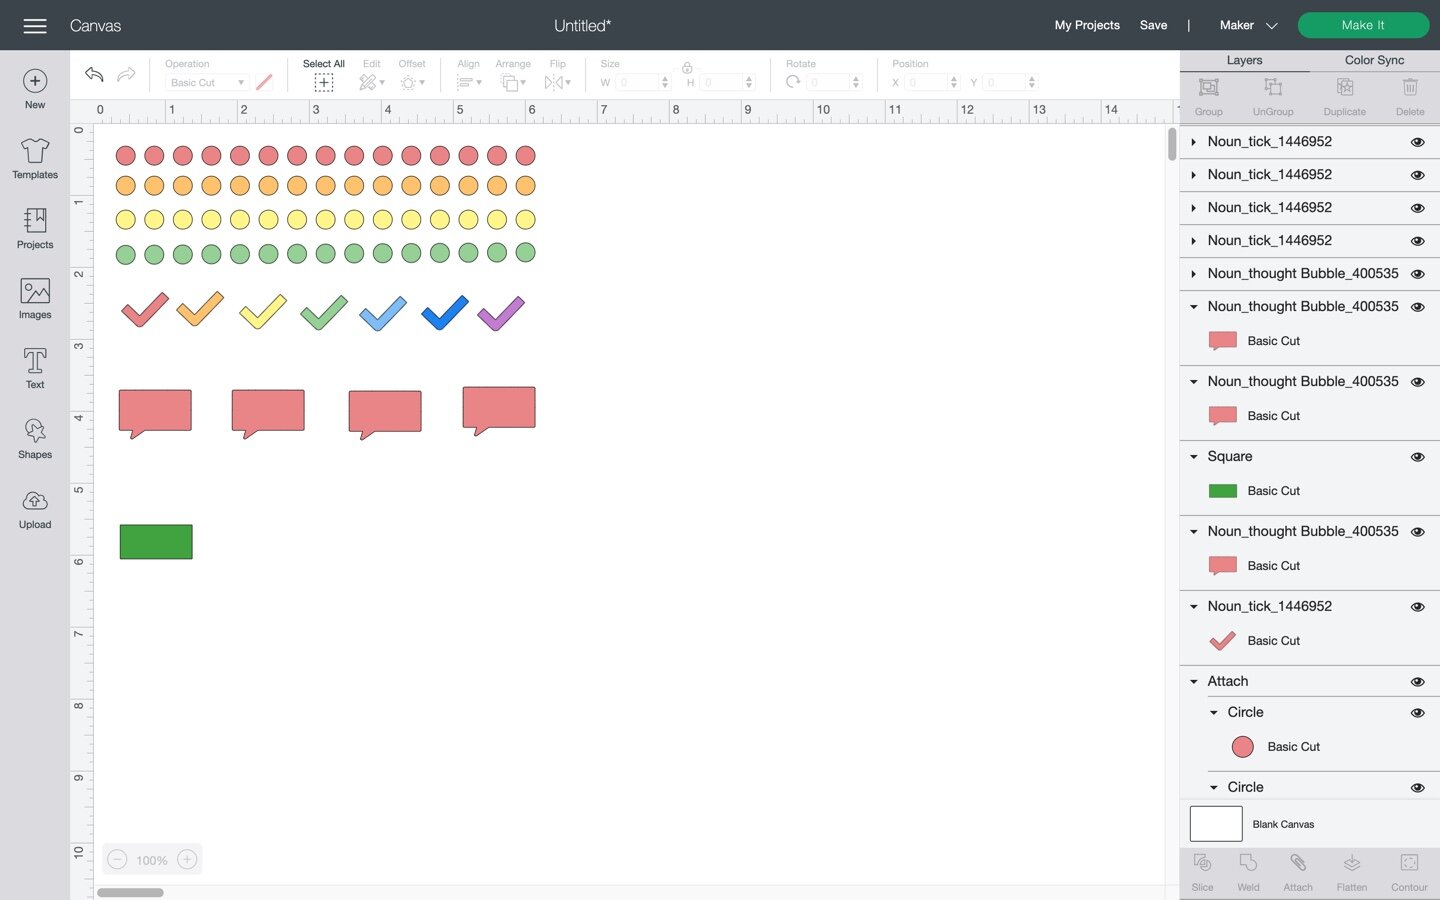
In the image above, I started making some planner stickers. I start by adding some circles and adding various shapes from there. I use the Align feature in the toolbar to make sure my shapes are lined up and evenly spaced apart.

You can change the color or add patterns in your stickers in the toolbar to your preference. You can add words to your stickers by adding text. You can also add icons to your stickers. The sky is the limit!
You can also make fun stickers with quotes or words on them within Cricut Design Space!
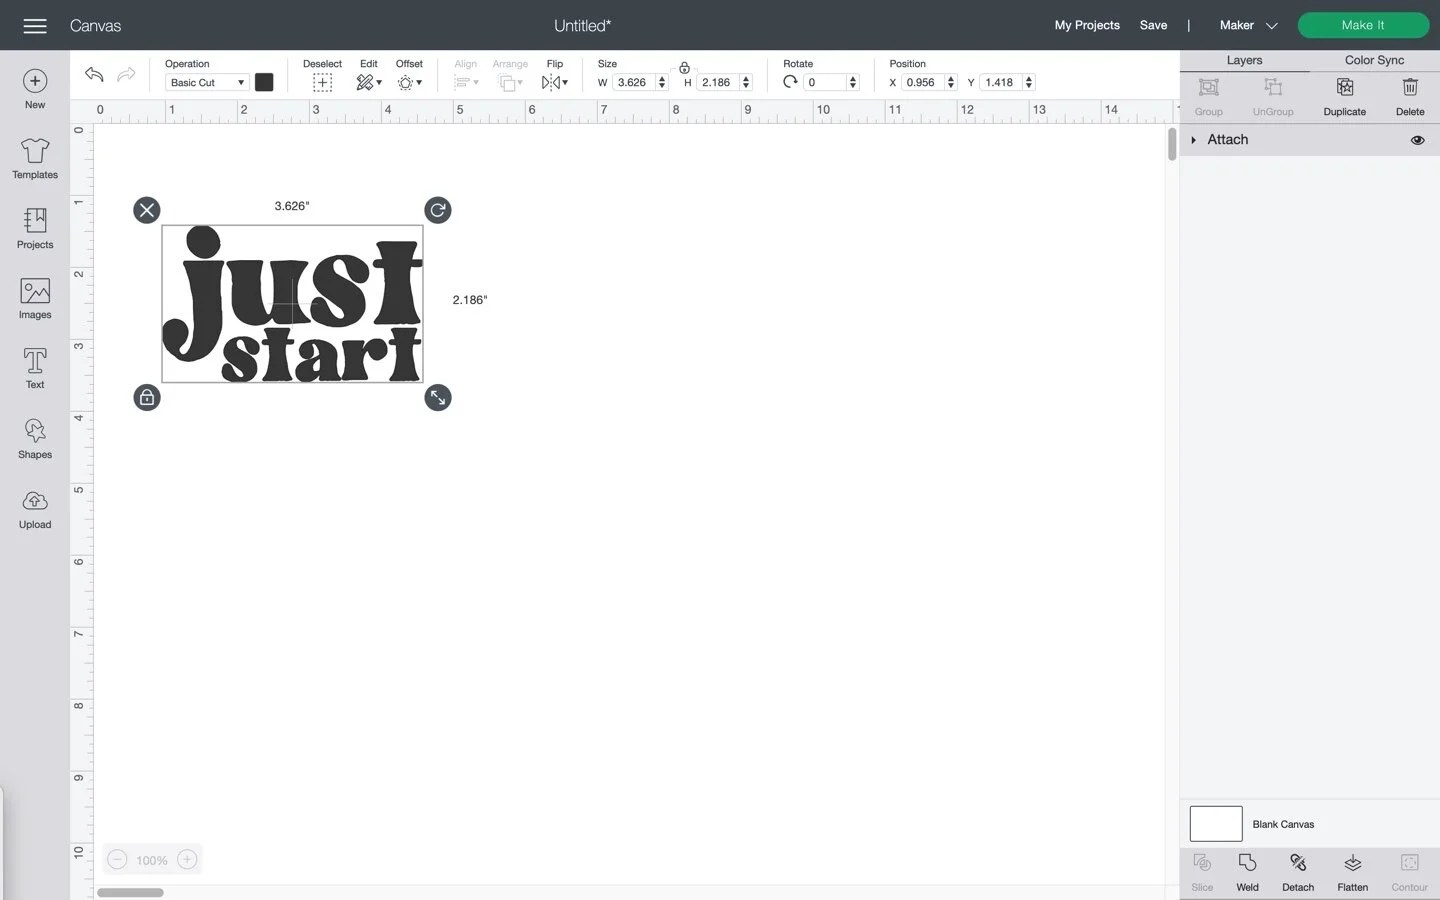
Go through this same process to make quote stickers. Simply type in the words you want on the sticker. Change the font in the tool bar. You can also change the color of the font if you want.

Next, you want to create an offset so the Cricut Maker will cut this as a sticker and not each individual word.
Click on one of your text. Click on Offset.
You will notice a border will appear around the image. Move the distance up or down to increase or decrease this border.
Click Apply.
Select All.
Align images center horizontally and center vertically.
Click Attach.
Click on the black rainbow in the layers panel. Make the color white or whatever color youprefer.
Click Flatten.
Notice the layers panel. Do you see a white border around my image? The white border tells my machine where to cut. Repeat these steps until you have enough quotes to fill your rectangle.
Once you have created a sticker sheet, make sure the stickers are within the size of your rectangle.
Delete the rectangle before you print!
How to make stickers in Canva?
Designing and creating your own stickers outside of Cricut Design Space is also an option. You can create amazing stickers in various programs and upload them into Cricut Design Space.
Many sticker makers use Procreate to design and make stickers. My favorite way to make stickers is in Canva Pro.
Canva pro has so many great icons, fonts, and graphics. I love to design stickers in Canva and export those designs as a PNG file.
I find the graphics and fonts in Canva pro to be more my preference than Cricut Design Space. It depends on what you are looking for and what you want to create!
To check on more about Canva Pro, HERE.
Let’s walk through how easy it is to make stickers in Canva.
Go to canva.com and click on Create a Design.
Click on Custom Size. In the menu, type in a custom size of 6.75” x 9.25”.
Click Create New Design.

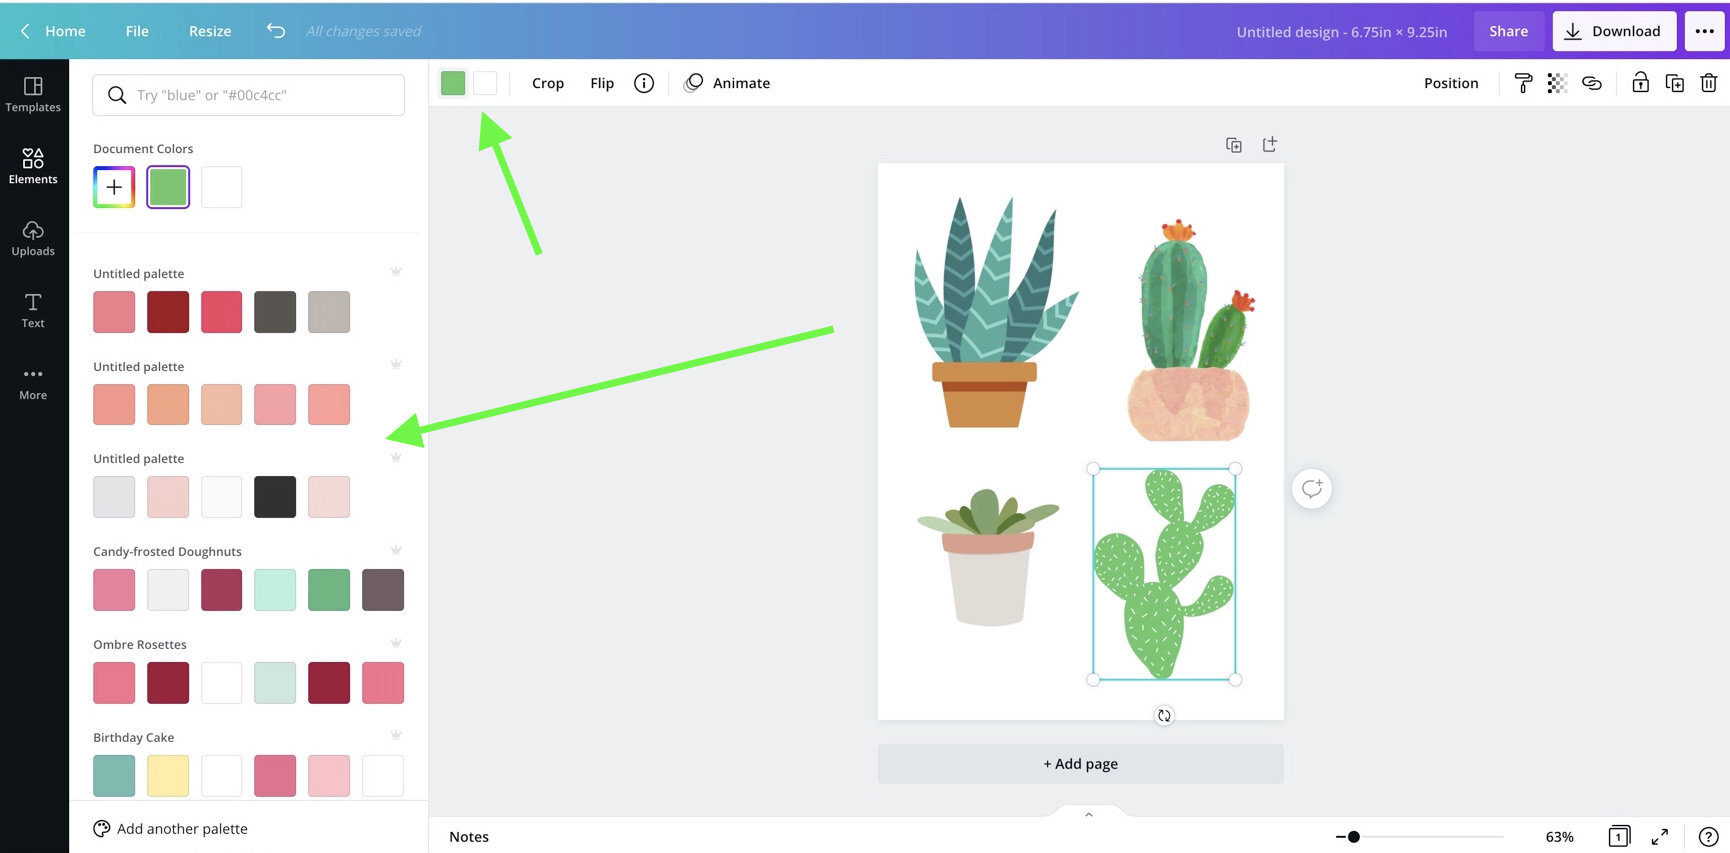
Click on Elements in the left-side toolbar. Canva Pro has so many options. Play around with it. For this example, click on Graphics.

If you are looking for something specific, type this into the search bar. Once you find an image you like click on it and Canva will add it to the project page you are working on.
For this example, I typed in Succulents in the search toolbar and added those images to my project page.

You can resize images by clicking on the image. Using your mouse, click on the white circle to make the image bigger or smaller. I like to size my stickers to about 3 to 3 1/2”. This is really up to you. There is no rule on this!

Some graphics in Canva PRO allow you to adjust the color. Note: not all graphics have this feature.
To find out what graphics can be edited for color, click on the image. See the green and white boxes on the upper left side of the screen (see arrow). Those boxes in the toolbar mean you can adjust the color of the image.
Click on one of the colors, a menu of colors will appear on the left side of your screen. You can upload color pallets to your Canva PRO account and they will appear here every time you work on a project. It is a great feature.
Click on any color and the image color will change.

When you have finished designing your stickers click Download.

Click on file type PNG.
I move the size down to 0.5. This is my preference.
Click Transparent Background.
Click download.
A PNG file will download to your computer. Follow the steps above to make stickers.
NOTE: Canva PRO does have licenses and copyright information on their website. Be sure to read through that HERE.
How do I turn an image into a sticker on Cricut?

To turn an image into a sticker. Click on the image. In the upper left-hand side of the toolbar click on the drop-down menu under Operation.
Select Print Then CUT, standard.

You will notice Print then Cut is next to the image in the layers panel.
How to make waterproof stickers on a Cricut
Waterproof stickers can be made in two ways.
Use vinyl printable sticker paper. Printable vinyl sticker paper is durable and resistant to harsh elements. The color won’t fade over time like traditional paper stickers. Most importantly, vinyl sticker paper is waterproof. The biggest downfall to vinyl sticker paper is cost. It is traditionally more expensive than sticker paper. If you are looking for an easy option and the cost does not matter, try vinyl sticker paper.
A second option is to add a waterproof layer to traditional sticker paper. We recommend THIS brand. Add this layer on top of your sticker paper before you cut while your sticker paper is on the mat. This video is an excellent tutorial!
RELATED: The 10 Best Sticker Paper options for Cricut
GET MY FREE FILE TO MAKE THESE PRINT THEN CUT STICKERS!