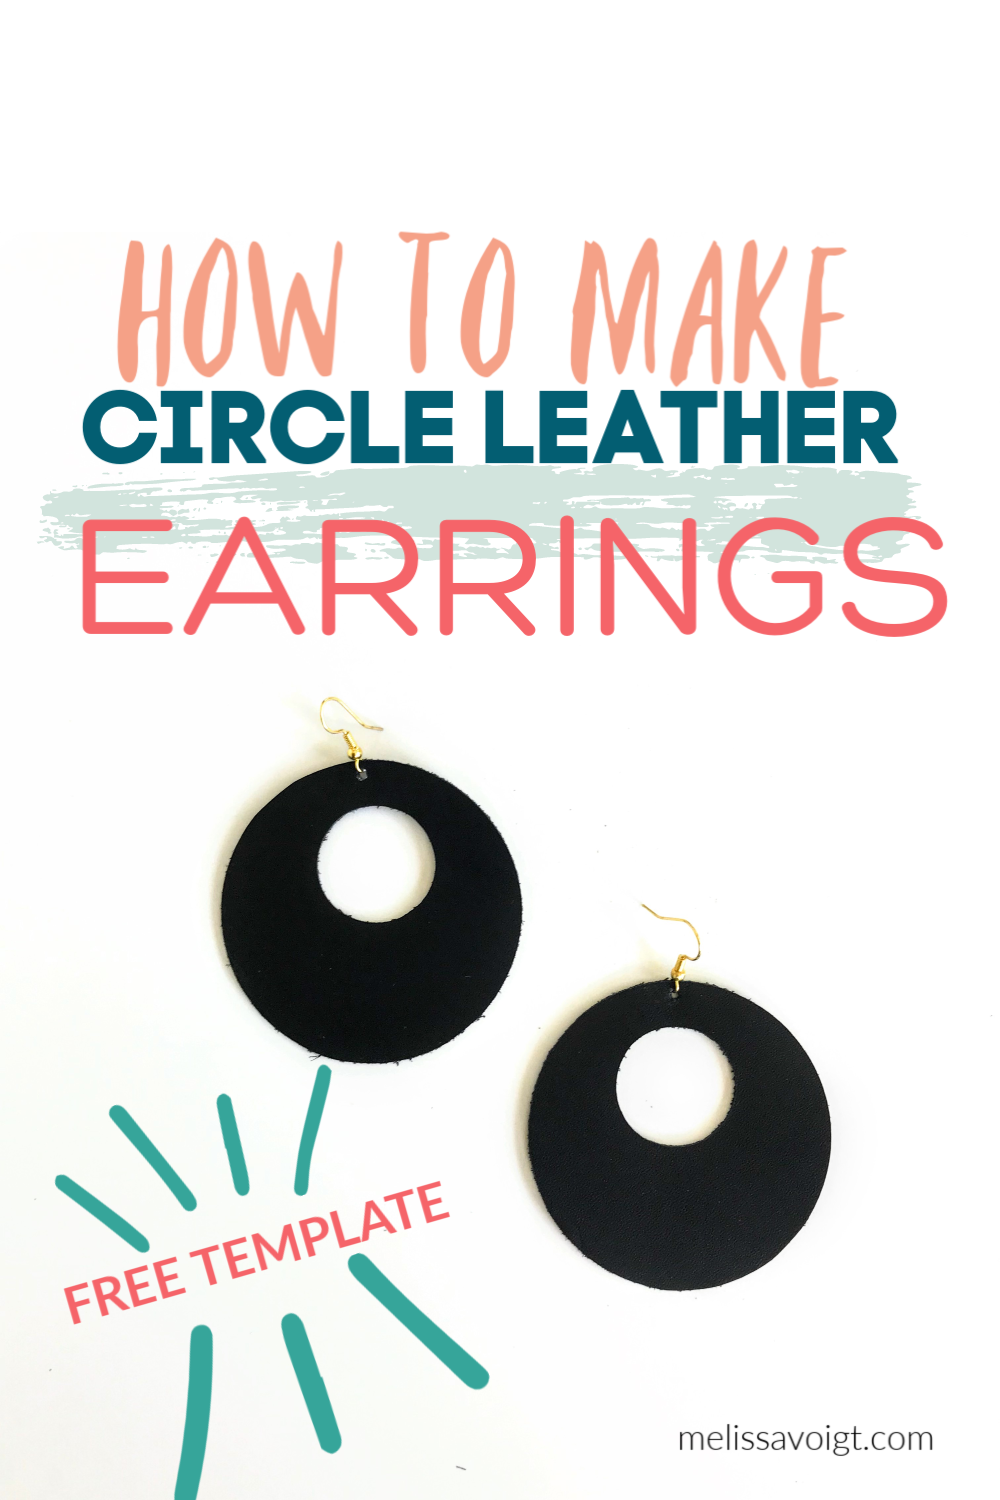
DIY CIRCLE LEATHER EARRINGS WITH OUR FREE SVG / PNG TEMPLATE
I”m so excited to share with you this circle leather earring template. I’ve been working on getting this template just right and I’m so thrilled. I shared my teardrop leather earring SVG/PNG template here. Be sure to grab that template as well!
Please note my leather earring templates are for personal use only. Make as many cute earrings for yourself or gifts for friends! You will find this is an easy and fun DIY craft!
I love making leather earrings with my Cricut. I made a pair of leather earrings a few years ago using shapes within Cricut Design Space. I wrote a quick post about it here. So many of you have read and loved that post. I knew I needed to make more! You can see my original DIY teardrop leather earring tutorial here.
RELATED LEATHER EARRING TUTORIALS:
DIY FOLDED FAUX LEATHER EARRINGS
DIY CIRCLE LEATHER EARRINGS WITH CRICUT DESIGN SPACE
DIY GEOMETRIC LEATHER EARRINGS
DIY ANTHROPOLOGIE INSPIRED LEATHER EARRINGS
My design uses an SVG / PNG file you can get for free inside my resource library. You can upload this file right into your Cricut design space! If you’ve never done that before, don’t worry. It’s easy. I'll walk you through it!
I wrote a post about how to upload files into Cricut Design space if you need more help.
These earrings are lightweight, incredibly easy to create and make a statement to any outfit! Let me show you how I make them!
HOW I MAKE DIY CIRCLE LEATHER EARRINGS WITH A SVG FILE
This post contains affiliate links which means I receive a small commission at no extra cost to you. If you make a purchase using this link. Cricut Machine. I used a Cricut Explore Air for this tutorial.
Black Cricut Brand Leather Sheets in 12 x 12
Cricut Mat - For this tutorial I used a strong grip mat
Cricut Cutting Blade - I use a deep cut blade to cut Cricut brand leather.
My free SVG / PNG Circle template (see below).
HOW TO MAKE LEATHER EARRINGS USING MY FREE SVG TEMPLATE ON YOUR CRICUT MACHINE

STEP 1 DOWNLOAD MY SVG / PNG FILE TO YOUR COMPUTER
Download my SVG/PNG file to your computer. You can get my free DIY Circle leather earring template inside my free resource library. You can get the password at the end of this page!
STEP 2 UPLOAD AND EDIT THE SVG FILE TO CRICUT DESIGN SPACE
This is what the circle template leather earring SVG looks like after you have uploaded into Cricut Design Space.

Next, you will want to size your earrings. You can do this any way you want and size to your preference but here is what works for me!
Click on your circle shape.
In the upper middle of your screen, you’ll see “size”. This is where you can make your earrings bigger or smaller. I recommend these sizes:
SMALL 2”
LARGE 2.5”
Finally, you’ll want to duplicate your earrings so you’ll have 2 earrings to cut. To do this you simply click anywhere on your earring. In the upper right side of your screen click “Duplicate”
Congrats! You now have 2 earrings! Your design should look like this.

STEP 3 CUT YOUR LEATHER
I used black Cricut brand leather. It is sturdy leather that cuts beautifully in my Cricut Explore Air. I used a strong grip mat and a deep cut blade. Be sure to read the instructions on the package of your leather. Cricut suggests you lay your leather face down on your strong grip mat. This will ensure your leather does not shift during cutting!
Also, Cricut suggests you move the star wheels on your machine when you cut leather. This video explains how to do this.
On my Cricut Explore, I set my dial to “Custom” and then selected “Genuine Leather”.
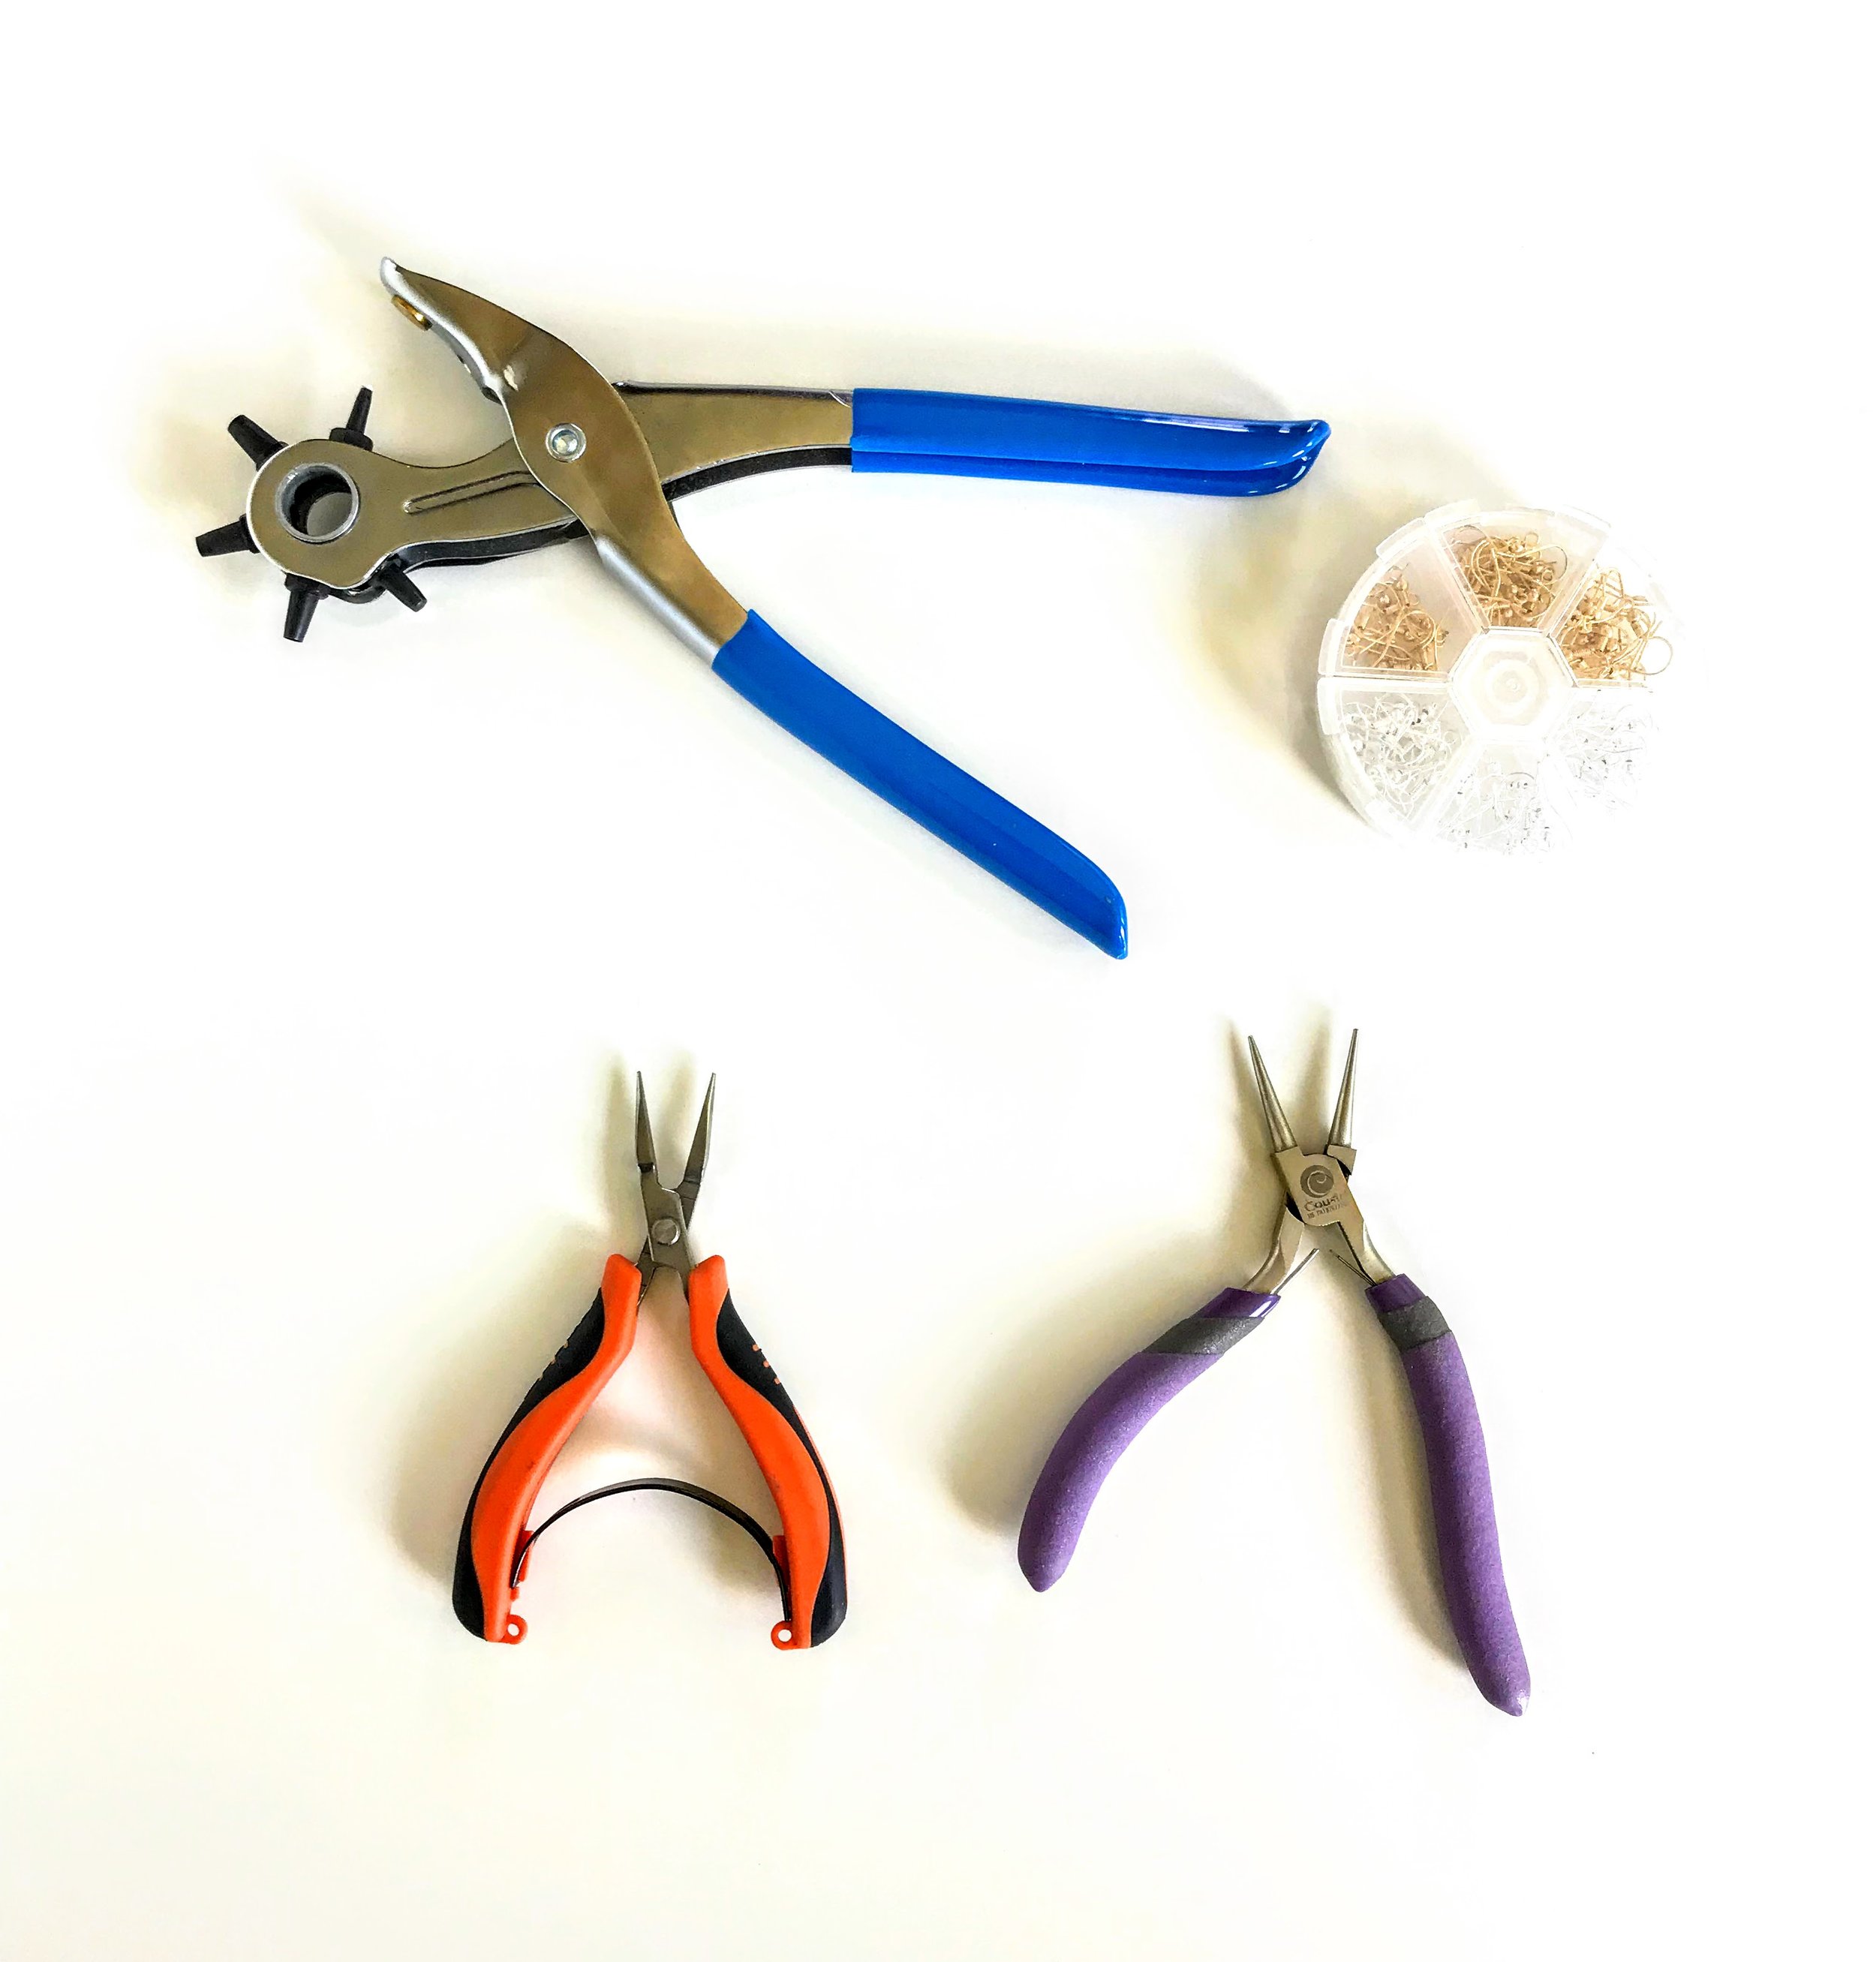
STEP 4 PUNCH HOLES IN YOUR LEATHER EARRINGS

My files do not include precut holes. I prefer to cut holes in my earrings using my leather punch. It is my preference. I think a leather punch gives you more control over where you want to place your earring hole.
I set my punch in the smallest setting.

For this design, you’ll want to make sure you punch a hole in the center. You can go about this two ways. You can pinch the earring (see photo below) to find the exact center. Punch your hole.
OR you could use a ruler to measure the exact center. Use a pencil to mark the center and punch!

STEP 5 ATTACH HOOKS TO YOUR EARRINGS

Open up your earring hook with your jewelry pliers. I prefer the flat nose pliers for this!

Thread your hook into your earring and clamp the hook back together.
Repeat this step with the other earring.